Bathroom guide
Shower Niche Ideas: 8 Tile, Trim and Shelf Designs
Compare tile, trim and shelf choices around your real bottles, finished storage dimensions and cleaning routine before the shower wall closes.
- By
- EstimatorPad Editorial Team
- Published
- October 26, 2026
- Reading time
- 15 min

Find the idea that fits
Start with the room you already have.
A niche that looks perfect empty can disappoint once the household moves in. The pump bottle won’t clear the top. The razor has nowhere to go. The tile pattern looks busy behind clear plastic. Every corner, grout line and shelf edge is also something you will wipe for years.
On this page
- Choose an idea
- 1. The quiet niche: wall tile carried inside
- 2. A contrasting tiled back inside a restrained surround
- 3. A compact horizontal niche for side-by-side storage
- 4. A tall niche divided into genuinely usable compartments
- 5. Separate niches for different users or storage tasks
- 6. A niche with a solid shelf and coordinated tile
- 7. A deliberate metal-profile or finished-tile edge
- 8. A factory-finished niche as an alternative to a fully tiled recess
- Compare the options
- Measure and test
- Three ways to build the same opening
- Choose the size and position around what you use
- Choose the edge and shelf together
- What to settle before the walls are closed
- When a niche is not the best answer
- Next step
- Before buying
- FAQ
1. The quiet niche: wall tile carried inside
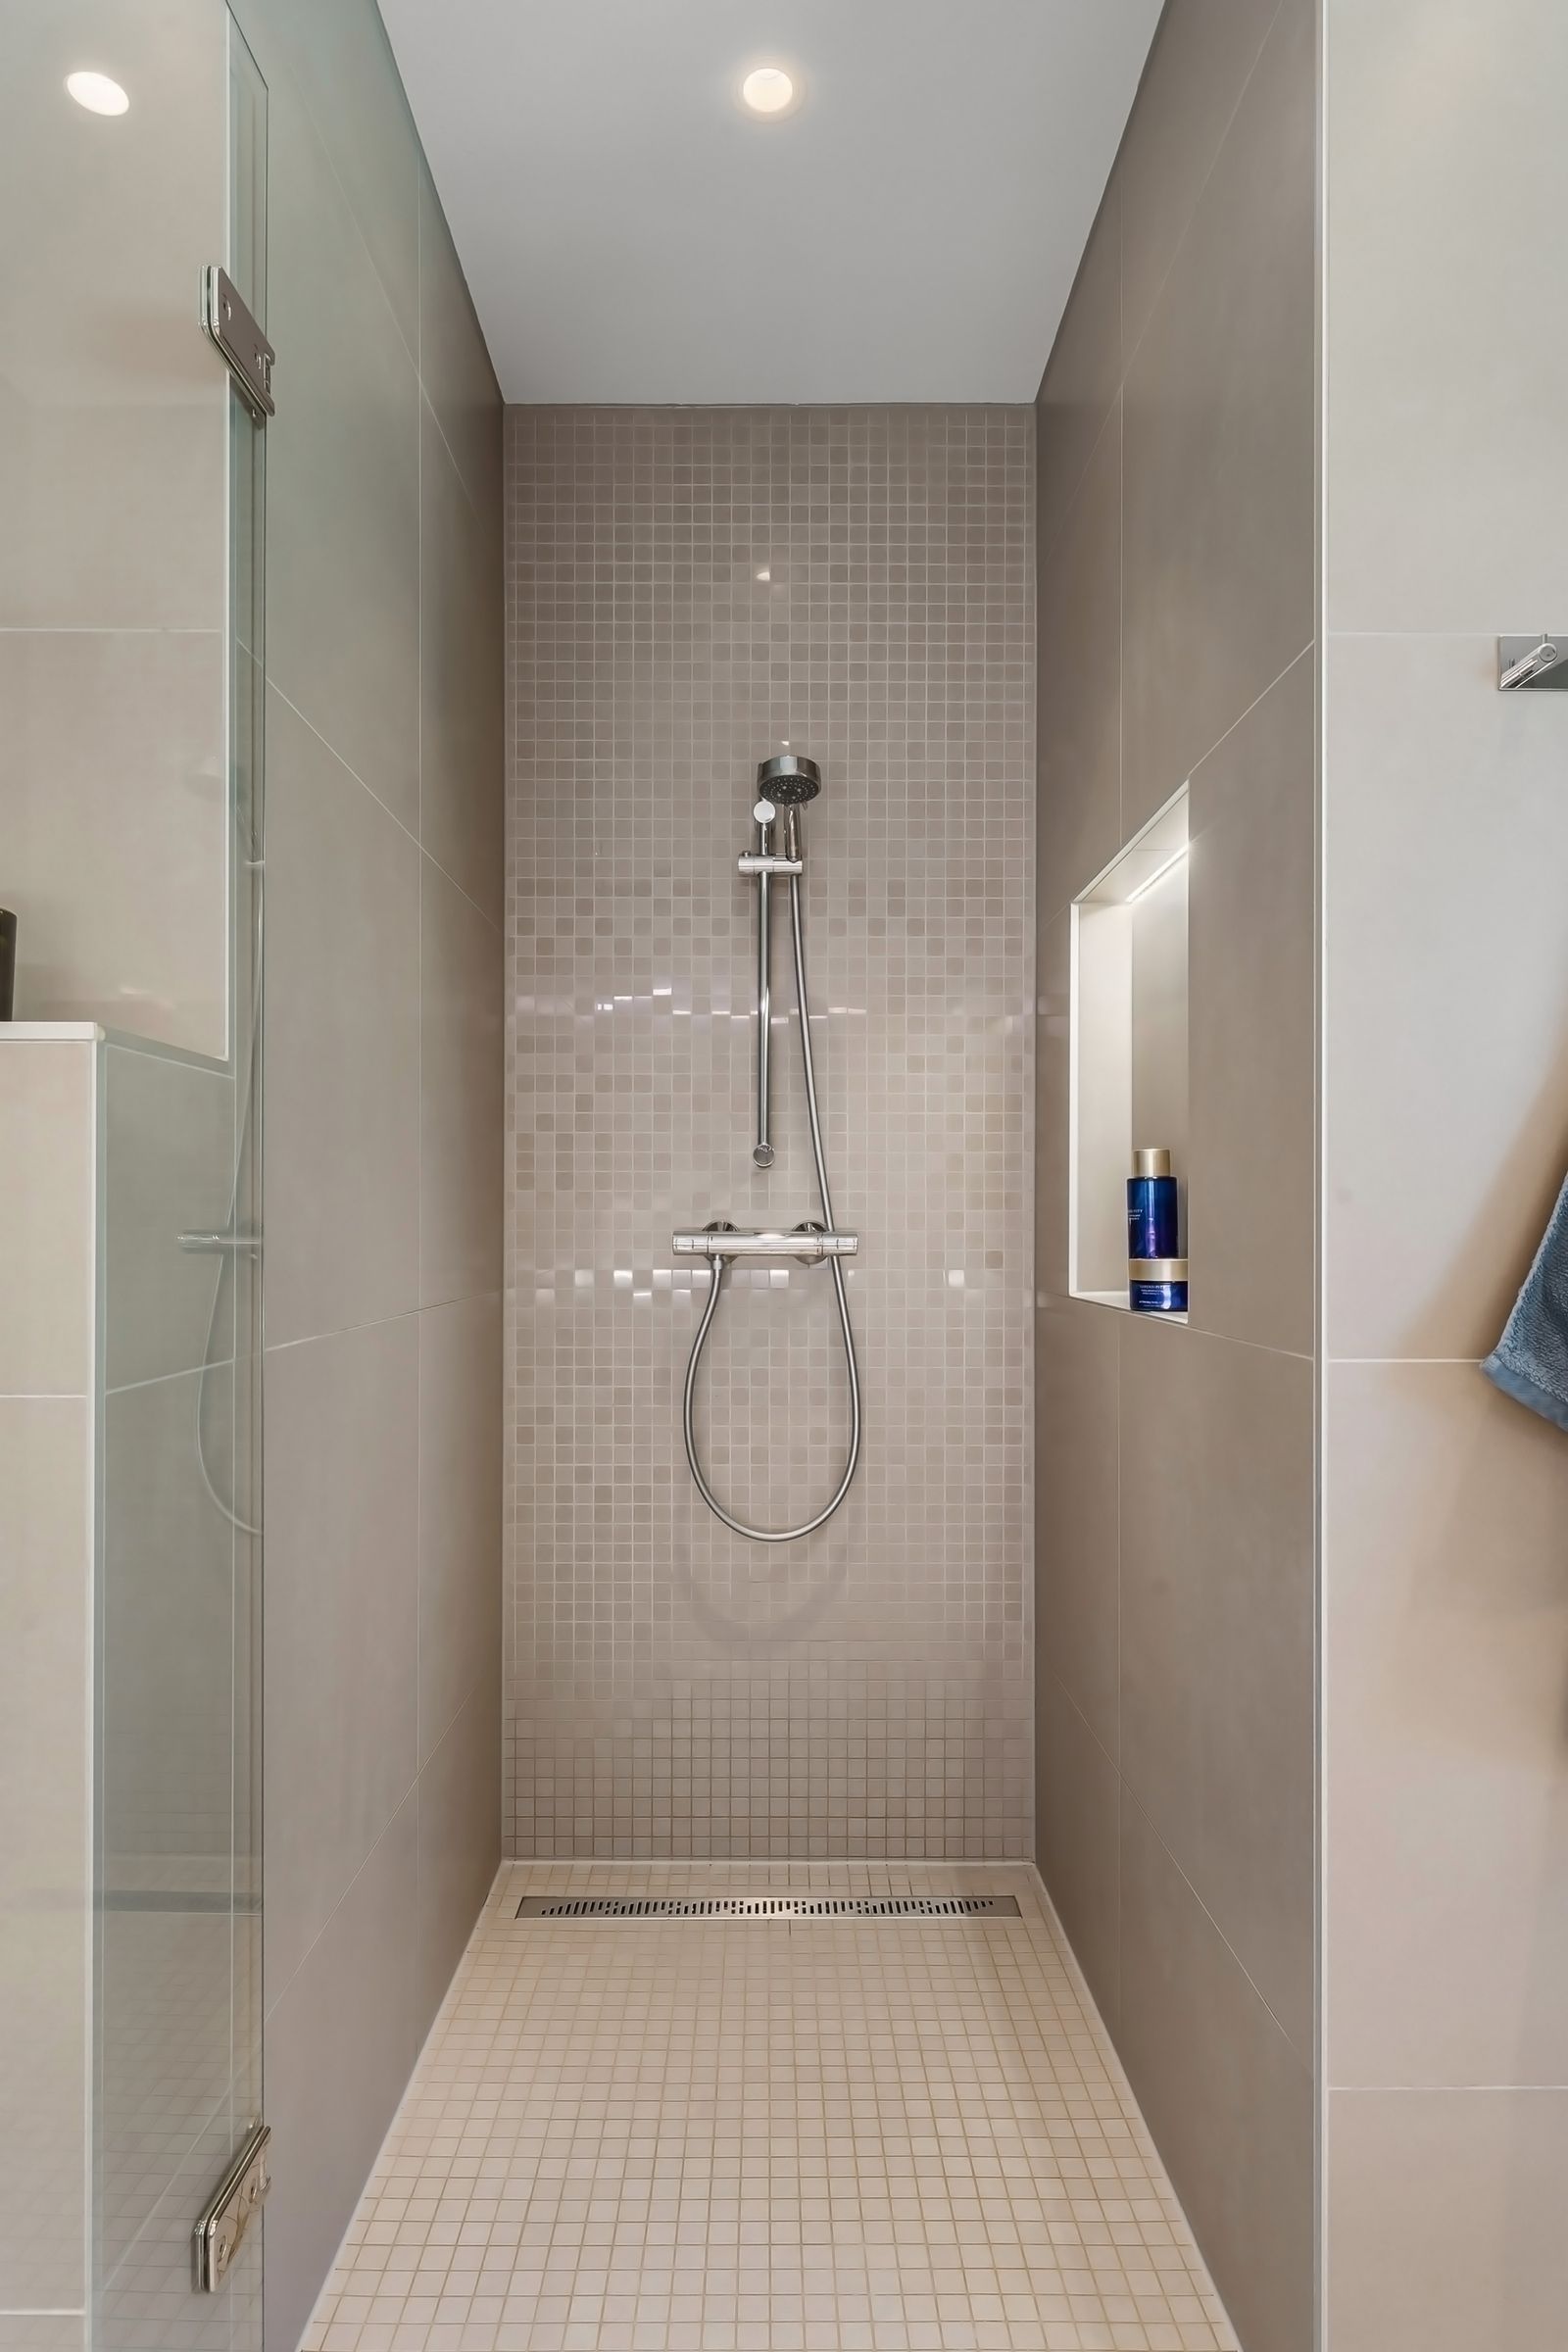
The opening nearly disappears. The same tile, grout color and finish run across the wall and into the recess, so the niche reads as a shadow rather than a feature. It suits a household with a modest, tidy set of bottles, and anyone who finds contrasting niches loud in a small shower.
The craft is in the layout. The opening’s edges and shelf line should land on the wall’s grout joints, so the niche doesn’t force slivers of tile above, below or beside it. Matching tile quiets the opening, but the bottles still decide how busy the wall looks. A repeating pattern will be interrupted by the recess, so check where the repeat breaks.
Test it: Draw several courses of your real tile to scale, or tape paper “tiles” to a wall. Slide a cardboard niche outline over them until its edges sit on full tiles.
Trade-off: Small-format tile means many joints on the back and sides, and soap residue collects in joints. Larger pieces reduce joints but change your alignment options. The exposed edges still need a deliberate finish (see below).
2. A contrasting tiled back inside a restrained surround
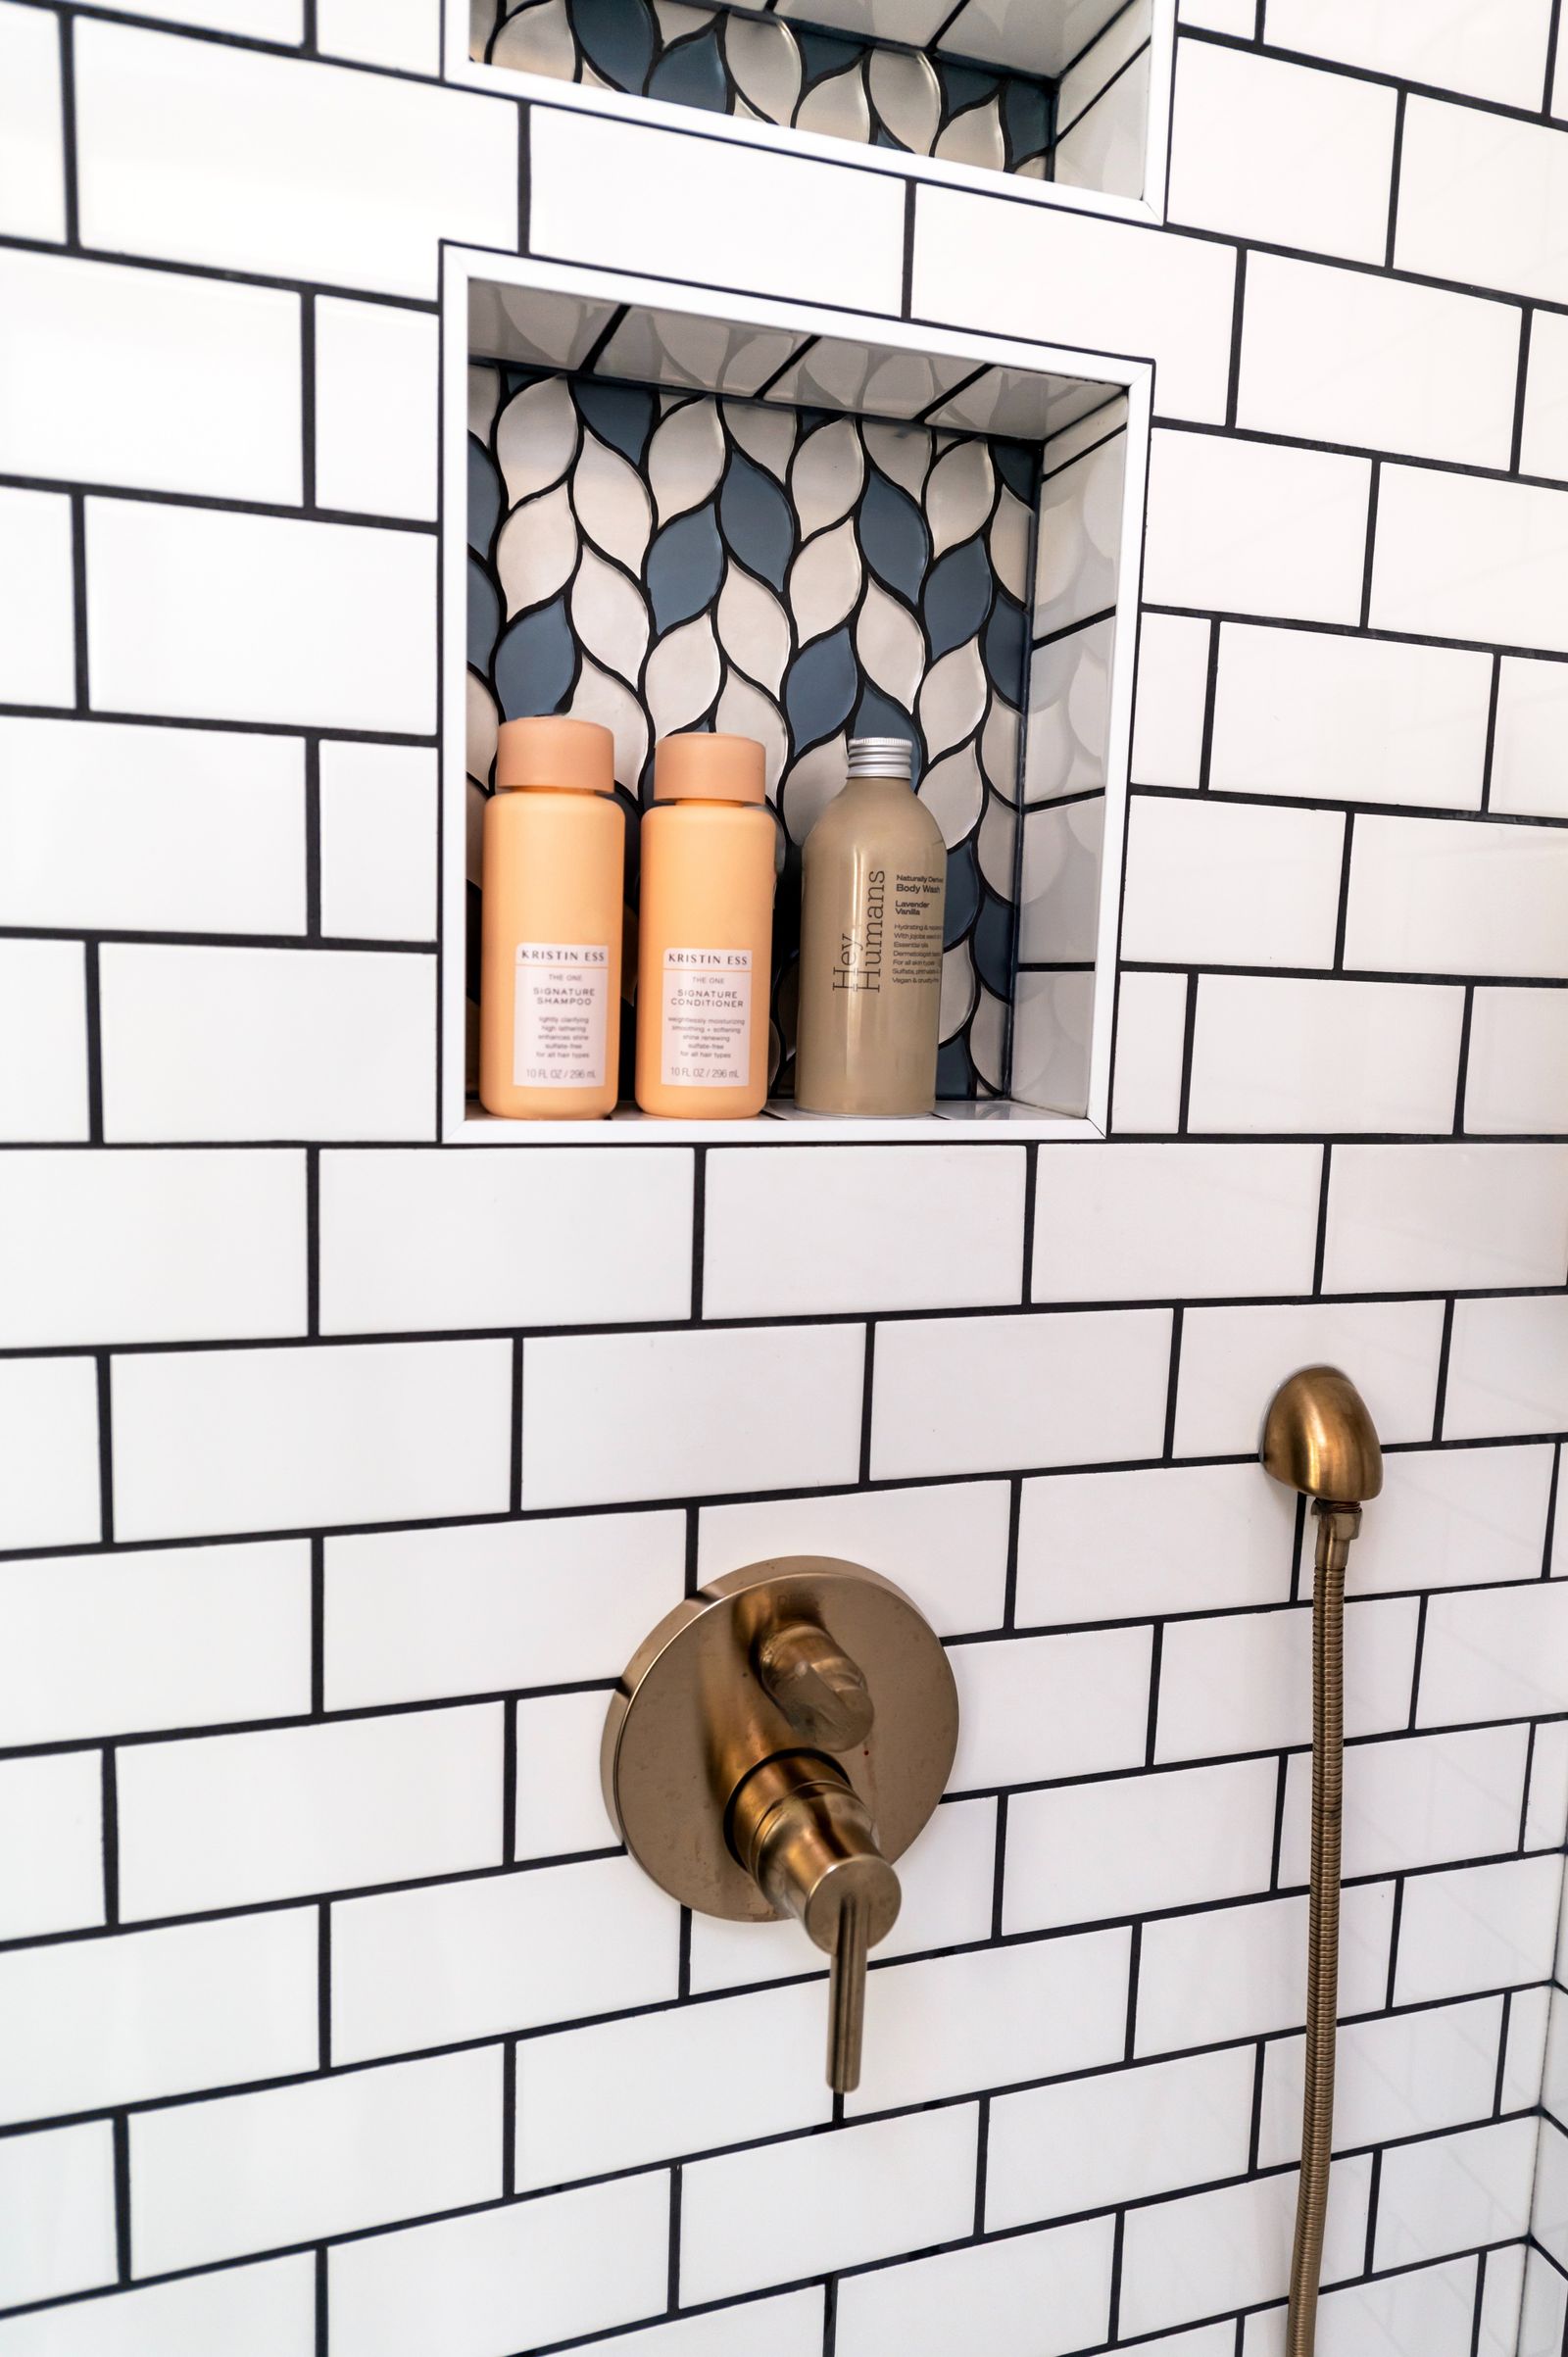
For shower niche tile ideas with personality, keep the wall calm and let the back of the niche do the talking. A deeper color, a texture or a small pattern behind the bottles, framed by plain wall tile, makes the niche read like a picture frame. It suits people with a short, curated line-up.
Restraint is the discipline: one accent surface, a slim edge and no second accent nearby. Accent tile is often a different thickness from the wall tile. That changes how the back sits against the edge finish and the shelf, so settle it with the installer before ordering. Patterns also behave differently behind bottles. A repeat that looks airy in a showroom can look like noise behind four bottles.
Test it: Tape a full-size printout or sample to the back of a cardboard mock niche. Stand your real bottles in front, then check it inside the shower’s light and from the bathroom doorway.
Trade-off: Contrast makes storage more visible, including clutter. Mosaic accents add joints to clean. The accent tile must be suitable for a wet wall, not only attractive.
3. A compact horizontal niche for side-by-side storage
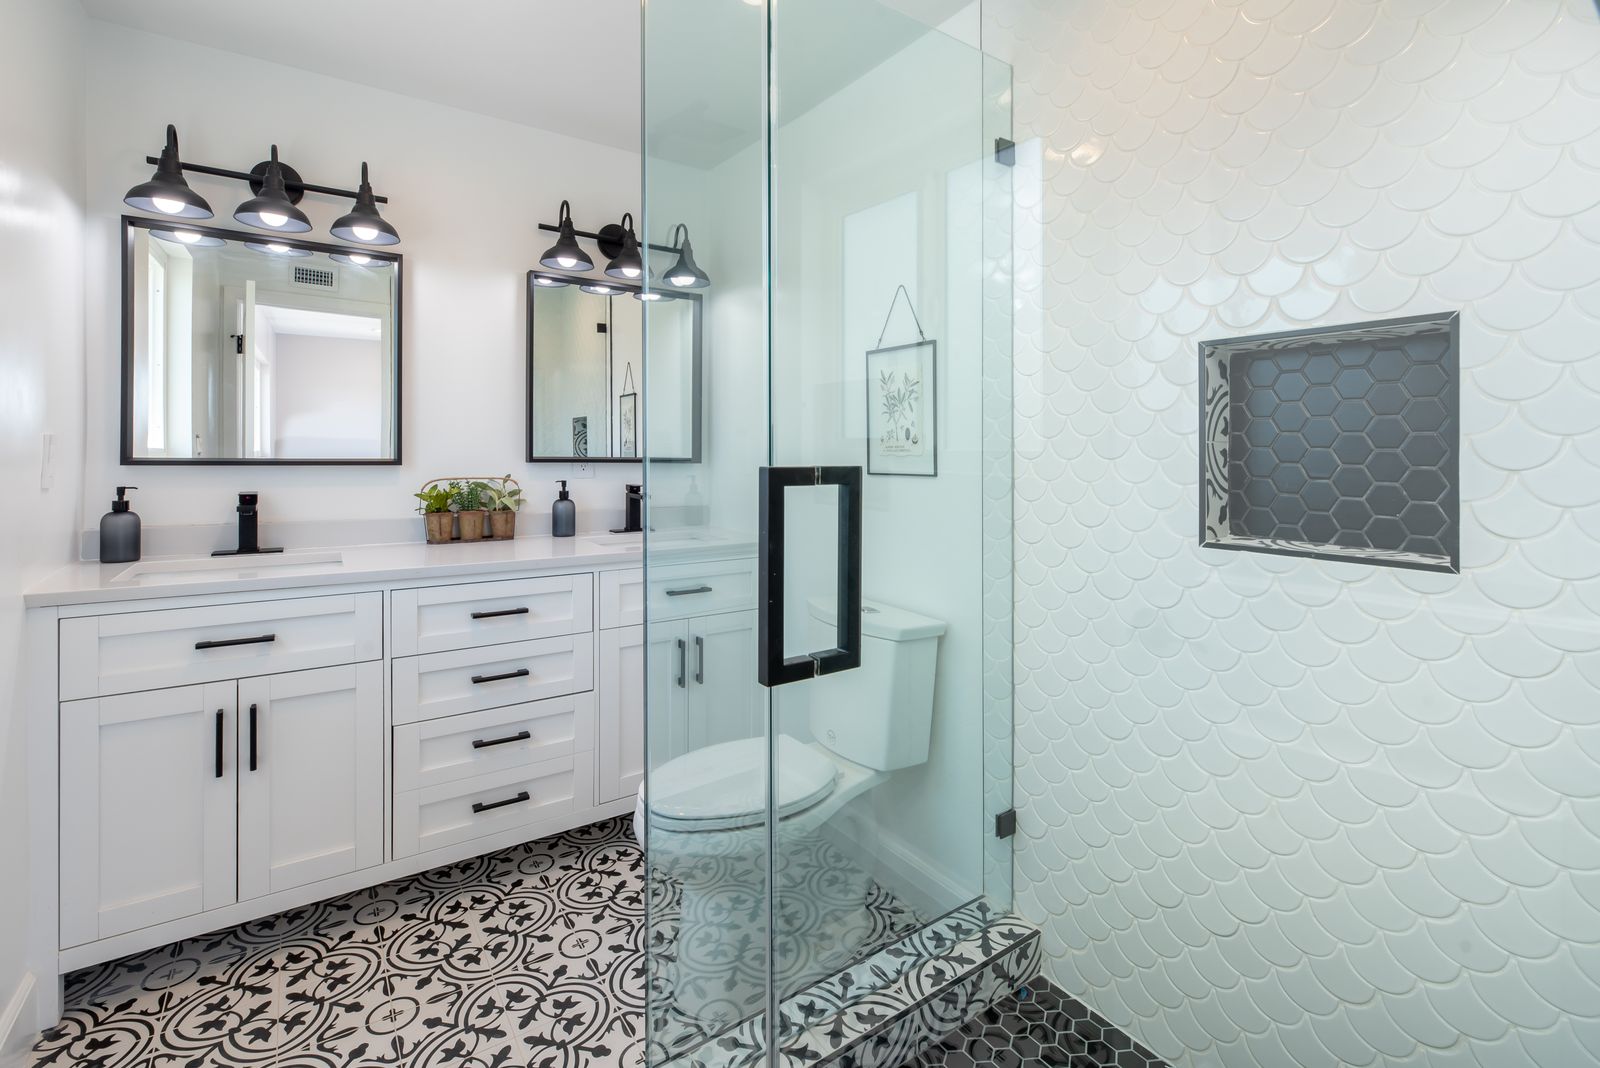
A wide, low opening gives bottles a single row. Everything is visible at once, and nothing has to be moved to reach something else. It suits shared showers where each person keeps a few products, and walls where a tall opening would run into other constraints. A horizontal niche can also sit on a horizontal grout line, which helps layout.
Length makes small errors visible. A long shelf shows any sag or uneven joint, and a long edge shows any wobble. Finish the whole run the same way, whether bullnose, profile or mitered tile, and keep the shelf joint consistent end to end.
Test it: Stand your bottles on a table with room for a hand between them, then measure the row. Tape that rectangle over your tile layout.
Trade-off: Width is limited by the wall, the framing and the products available. A wide opening is also the first thing seen from the doorway, so it is the hardest to hide clutter in.
Advertisement
4. A tall niche divided into genuinely usable compartments

Think of a tall niche as a narrow bookcase: it only works if the shelves sit at the right heights. It suits a narrow wall with vertical room, or a household mixing tall bottles with small items like razors or a scrub that deserve their own tier.
More compartments don’t automatically mean more storage. Each shelf takes its own thickness, plus tile build-up, from the space above it. A pump bottle needs room to operate above the pump head, not just enough height to stand upright. A single shelf in the wrong place wastes both tiers. Without a shelf, a tall opening may provide less useful storage for shorter items. Shelf height is a pre-tiling decision: Schluter’s instructions have it marked with a level line before the shelf is set, while ARDEX describes the shelf in its niches as movable up or down.
Test it: Build a cardboard box with paper shelves. Put your tallest pump bottle in the lowest tier and operate it with your dominant hand.
Trade-off: Lower tiers are harder to see into, and upper tiers can be out of reach for the shortest user. Each shelf also adds a joint to seal and clean.
5. Separate niches for different users or storage tasks
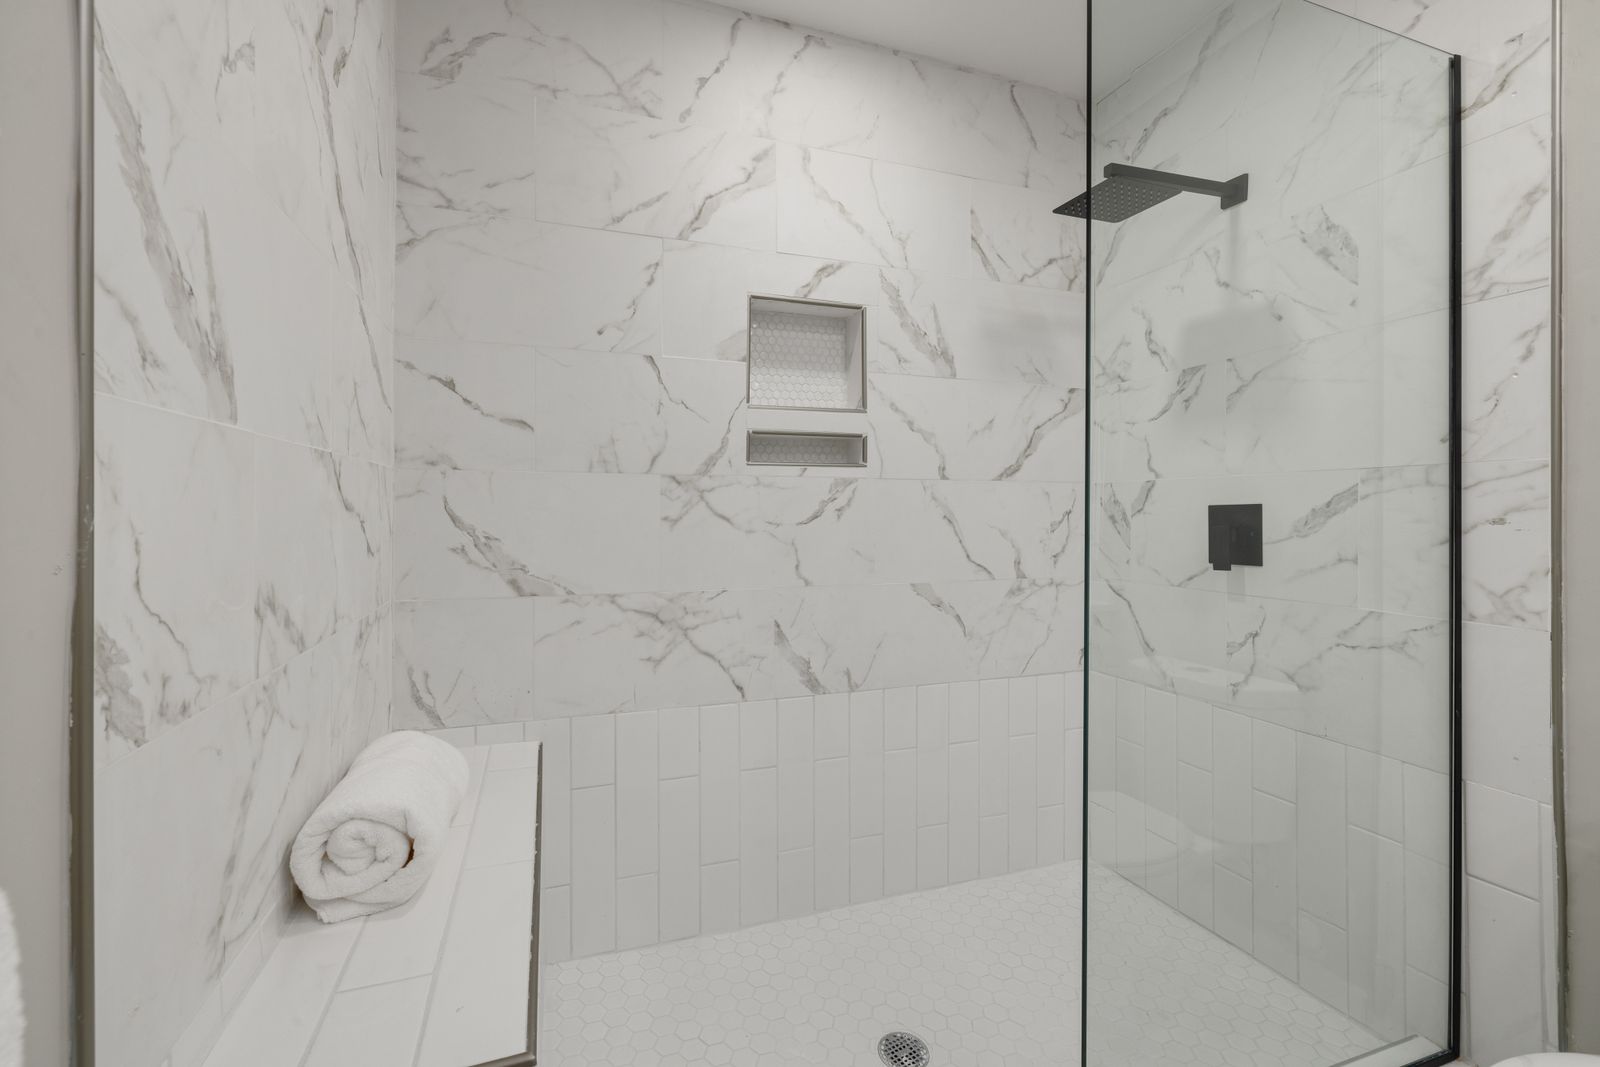
Two modest niches can serve a household better than one large one. A main niche at standing reach and a smaller storage opening lower down, for a child’s items or shaving products, is one way to split the load. It suits several users of different heights, and showers where one person’s products keep crowding another’s.
Give the pair a visible logic. Align them on the same tile lines, or match their sizes and edge finish, so they read as a plan rather than an afterthought. Two openings on one wall are a stronger statement than one.
Test it: Ask each user to stand in the dry shower position and point to where they would naturally reach. Note the heights on a paper strip.
Trade-off: Each opening is its own connection to the wall to waterproof and its own set of edges to clean. Framing and anything running through the wall limit where openings can go, so the installer has the final say.
6. A niche with a solid shelf and coordinated tile

A single stone, porcelain or solid-surface shelf piece makes a crisp, thick line across the opening. It can match the wall tile or play off the niche back. It suits people who want the shelf to look like furniture rather than a tile ledge.
Material choice decides the care. Natural stone varies widely, and some stones such as marble can be sensitive to acidic cleaners and may need sealing. Porcelain is a different material with different edge and care questions. Engineered or solid-surface products need manufacturer approval for continuous wet use. Don’t assume a leftover piece is suitable. The shelf’s thickness comes straight out of the compartment height, and the front edge needs a finish.
Test it: Cut cardboard to the shelf’s real thickness and depth, set it in your mock niche and see how much bottle height remains.
Trade-off: A solid shelf sits in a wet zone. Ask the supplier for written care instructions, and ask the installer how the shelf is supported, joined and drained. Joint and bonding materials come from the installation system’s documents, not a hardware aisle.
Advertisement
7. A deliberate metal-profile or finished-tile edge

The niche is outlined, either by a thin metal profile or by factory-finished tile edges such as bullnose. Metal finishes like black, brushed or brass-toned are choices within one idea, not separate ideas. Choose the finish to coordinate with your fixtures and any metal shelf, rather than adding another metal. It suits clean, modern walls and anyone who wants outside tile corners protected.
The edge becomes the feature, so alignment shows. Profile height has to suit the tile thickness, and the corners need a plan: purpose-made corner pieces or carefully cut joints. Schluter says its KERDI-BOARD-SN niche can be framed with select profiles, and that profiles near its DESIGN-NICHE are fine if each product’s instructions are followed. Check that your chosen profile is approved for your niche system.
Test it: Cut paper strips to the proposed line width and tape them around your mock niche. Look at the line’s weight from the doorway.
Trade-off: The frame is a visible line of different material to keep clean. Metal finishes have care limits. Schluter’s guidance for its shelves is to use neutral cleaners and avoid strong acids, bleach, ammonia and abrasives, and that applies to the finish you choose.
8. A factory-finished niche as an alternative to a fully tiled recess

A powder-coated aluminum niche has crisp edges and nothing to grout inside. Check the current sizes, finishes and intended orientation for the exact unit. It can sit flush with the tile or protrude as a reveal edge, and it can be installed vertically or horizontally. It suits people who want fewer grout lines and a precisely finished opening.
Several details matter. You can’t tile inside it, it can’t be adjusted after installation, and it needs blocking behind the frame. Confirm the body, finished clear opening and outer frame dimensions separately so the frame lands deliberately in the tile layout. Schluter says the niche has no slope and notes that water tends to bead around the base of items regardless of slope. Cleaning guidance is to avoid abrasives and cleaners containing hydrochloric or hydrofluoric acid.
Test it: Mock up the frame size, not just the opening size, over your tile layout.
Trade-off: Sizes and colors are fixed, so you can’t tune the niche to your tile. It is a system with its own installation requirements, so a “seamless” look does not mean maintenance-free or low-planning.
Compare the eight directions
| Direction | Best fit | Tile/edge approach | Main trade-off |
|---|---|---|---|
| 1. Quiet, matching | Tidy bottle line-up; calm wall | Wall tile inside; edges aligned to wall joints | Many joints with small tile; layout must land well |
| 2. Contrasting back | Short, curated line-up | One accent back; slim, restrained edge | Highlights clutter; accent must suit a wet wall |
| 3. Horizontal | Shared showers; side-by-side items | Long run aligned to a tile course | Wide opening dominates the doorway view |
| 4. Tall with compartments | Narrow wall with vertical room | Shelf at tested heights; consistent joints | Each shelf costs headroom and adds a joint |
| 5. Separate niches | Multiple users or heights | Matched sizes and edges; shared alignment | Two connections to waterproof; two sets of edges |
| 6. Solid shelf | Visible, thick ledge | Stone, porcelain or solid-surface piece | Material-specific care and wet-use suitability |
| 7. Metal or finished edge | Clean modern line; corner protection | Profile or factory bullnose coordinated with fixtures | Alignment shows; finish has care limits |
| 8. Factory-finished | Few grout lines; precise opening | Frame set flush or as a reveal | Fixed sizes and colors; system-specific installation |
Measurement steps
How to measure
- Measure the tallest bottle including its pump and room for a hand above it.
- Measure the complete bottle row with usable hand space rather than sizing an empty opening.
- Mock up the finished clear dimensions after the shelf, tile and edge build-up.
- Test the intended position with every user standing safely in the dry shower position.
- Have the installer review framing, services, tile alignment and the waterproofing connection before the wall closes.

Advertisement
Three ways to build the same opening
The ideas below look different, but they rest on three build routes.
Prefabricated tile-ready niche. A foam or board box that is installed in the wall and tiled inside. Schluter’s KERDI-BOARD-SN, LATICRETE’s HYDRO BAN Preformed Niche and ARDEX’s TLT niches are examples.
Site-built niche. Framed and waterproofed on site using the installer’s chosen system.
Factory-finished niche. A complete unit, such as a powder-coated aluminum niche, with no tile inside.
A box sold as waterproof is only part of the job. Each manufacturer specifies a separate step for joining the box to the surrounding wall. Use the niche manufacturer's current connection detail for the surrounding waterproofing system; do not combine products just because each is described as waterproof. Schluter’s shower overview is blunt that tile isn’t inherently waterproof, and LATICRETE states that mortars and grouts aren’t a replacement for a waterproofing membrane.
Choose the size and position around what you use
Gather everything that belongs in the shower. Include bottles, bar soap, razors, scrubs and children’s items.
Measure each item. Record its widest point, its height with cap or pump, and the space above for a hand to operate it.
Subtract the shelf and build-up. Shelf thickness, tile, setting material and edge finish all reduce the clear opening.
Make a full-size outline. A cardboard box with the intended inside dimensions can be loaded on a counter. If the wall is accessible, tape the outline in place.
Test reach with every user. Have each person stand dry in the showering position.
Overlay your tile layout. Check that edges land on full tiles and that no thin slivers appear. Then view the wall from the bathroom doorway.
Hand the plan to the installer. Have them resolve framing, services in the wall, the waterproofing connection and product compatibility before construction.
What a homeowner can measure and decide: the items, the heights, the reach, the look, the tile layout and the doorway view.
What the installer must verify: the wall framing, anything running through the wall, the waterproofing connection method, product compatibility, the shelf detail and the drainage guidance for your system.
Product names are shorthand, not usable dimensions. Schluter lists its board niches as 12 × 6, 12 × 12, 12 × 20 and 12 × 28 inches with a 3½-inch depth. LATICRETE’s drawings state that its dimensions are nominal. ARDEX’s model names come with a separate sizes sheet listing several different figures per model. None of these tells you the clear space left after tile and a shelf, so ask for that figure in the finished position.
There is no universally correct height, depth or distance from the showerhead. A niche placed away from direct spray may get less splash, but that doesn’t remove any waterproofing requirement.
Choose the edge and shelf together
A shower niche shelf and its edge share joints, thickness and cleaning, so decide them together.
A few points cut across all five.
Fit is product-specific. Schluter’s SHELF-N is made for its KERDI-BOARD-SN niches, and ARDEX’s niches come with their own adjustable shelf. A shelf for one system isn’t a drop-in for another.
Drainage guidance differs by product. Schluter’s tile-shelf guidance for its board niche describes raising the shelf at the back or setting tile on a slope to avoid pooling. Its factory-finished niche is described differently. Where the product documents do not address it, so ask for written guidance for your exact niche-and-shelf pair.
Joints are system-specific. Follow the exact shelf manufacturer’s joint and support details. Do not substitute grout for a specified sealant, or assume a visible sealant joint replaces the wall’s waterproofing connection.
Load ratings may not exist. Schluter says it doesn’t publish maximum load ratings for its shelves. Don’t assume a number.
Stone, porcelain and engineered materials are different. Don’t treat them as interchangeable.
| Option | Look | Exposed edges and joints | Care | Skill and verification |
|---|---|---|---|---|
| Factory-finished tile edge or bullnose | Matches the tile; soft rounded edge | Edge is finished at the factory | Same as tile and grout | Check that trim exists for your tile line |
| Compatible metal profile | Thin line; finish options | Corner pieces or cut joints | Neutral cleaners; avoid abrasives and strong acids or alkalis | Profile must suit tile thickness and the niche system |
| Mitered tile edge | Continuous tile look, no trim line | Exposed joint at the corner to keep sealed | Same as tile and grout | Skilled work; ask for a sample showing the cut edge |
| Solid stone or solid-surface shelf | Thicker, furniture-like line | Fewer shelf joints, but joints at the wall | Material-specific | Confirm wet-use approval, support and drainage detail |
| Manufacturer-designed niche shelf | Designed to fit a specific niche | Sealant joints at the wall | Per manufacturer | Confirm exact fit and compatibility |
What to settle before the walls are closed
Niche model or construction approach: prefabricated, site-built or factory-finished.
Finished storage dimensions: the clear size after tile, shelf and edge.
Wall, framing and services: what the installer confirms is possible at the chosen location, including wall type.
Waterproofing connections: how the niche joins the surrounding system, in that system’s own instructions.
Drainage guidance: product-specific for the exact niche and shelf.
Tile layout and edge treatment: alignment, slivers and the edge finish. A tile calculator helps estimate quantity once the layout is set, but it can’t tell you whether a niche fits or how it should be waterproofed.
Shelf details and care: material, support, joint and cleaning.
Access for cleaning: can you reach and wipe every corner?
Advanced option: illuminated niches exist as manufacturer systems, and Schluter lists one with integrated LED lighting. Treat that as a complete-system decision requiring qualified installation, not an add-on.
When a niche is not the best answer
A niche is a built-in decision. It makes the most sense when the wall is open or being rebuilt. It is a poorer choice in several situations.
The shower is already finished and waterproofed.
Framing or anything running through the wall limits the location.
Adding a recess would mean substantial work for modest storage.
In those cases, compare a suitable manufacturer-approved surface-mounted or corner shelf. They aren’t all alike. Some systems are installed together with the tile, so they’re a before-tiling decision too. Others are retrofit shelves that mount with adhesive, screws or either. Load limits depend on the exact product and wall, and at least one major manufacturer states that its maximum load depends on wall type and fastening. Drilling through tile into a waterproofed wall is a penetration question, not a casual one. Compare the exact product’s mounting method, load limit, care instructions and approval for your wall type.
Next step
Gather your bottles, build a cardboard mock-up of the storage opening and test it with everyone who showers there. Then take that plan, with your tile layout, to your installer before choosing a niche from a photo alone.
Project checklist
Before you buy or build
- Finished bottle capacity tested
- Shelf and edge chosen together
- Reach checked for every user
- Written system-specific drainage detail confirmed
- Waterproofing connection reviewed by the installer
Planning note
Verify before buying or building.
Photographs are visual references, not EstimatorPad projects or verified installations. Confirm the exact product instructions and suitability for your own room before buying; construction, waterproofing and repair details need the appropriate installer.
FAQ
Common questions
01Should the niche be horizontal or vertical?+
Neither is universally better. A horizontal opening suits a row of bottles and can sit on a tile course. A vertical one suits a narrow wall or tall items, but only pays off if its shelves fall at useful heights. Test with your actual bottles.
02Should niche tile match the wall or contrast with it?+
Matching quiets the opening. Contrast makes the storage more noticeable and can flatter bottles, but it also highlights clutter and any misaligned cut. Decide how tidy you will keep it, and check the doorway view.
03Can grout alone waterproof a niche?+
No. Tile and grout are the finished surface, not the waterproofing layer. A prefabricated waterproof box helps, but its connection to the wall must still be completed as the manufacturer specifies.
04Why do shelf drainage instructions differ between products?+
Because the arrangements differ. One maker’s tile-shelf guidance describes ways to avoid pooling, while another product from the same maker is described as having no slope. Some makers’ documents don’t address it. Ask for written guidance for your exact system.
05Can I add a niche to an existing shower?+
It means opening a waterproofed wall and restoring the waterproofing to the system’s requirements, which is work for a qualified installer rather than a casual add-on. Compare a surface-mounted shelf first.
06How close to the showerhead can a niche go?+
There is no universal distance. A spot out of direct spray may keep bottles drier, but the niche still needs full waterproofing like any other part of the wall.